5 Easy Tips to Style Your Dishes for Perfect Instagram Photos
Capturing the perfect Instagram photo of your dishes can be a game changer for your food blog. Here are 5 easy tips to help you style your dishes for those picture-perfect moments. First, always aim to use natural light; setting your table near a window can enhance the colors and textures of your food. Consider the use of a white or neutral-colored background for your plate; this will not only make your dish pop but will also create a clean aesthetic that's visually appealing on social media.
Next, pay attention to the arrangement of your dish. Utilize the rule of thirds when placing your food on the plate, as this will guide the viewer's eye across the image. Incorporating props like vibrant napkins, fresh herbs, or vintage cutlery can add depth and context to your photos. Don't forget to shoot from different angles; a top-down view often works perfectly for flat dishes, while a side angle is great for showcasing layers in hearty meals. By following these easy styling tips, your Instagram feed will be transformed into a delightful showcase of your culinary creations!
The Ultimate Guide to Food Photography: Lighting, Angles, and Props
Food photography is an art that requires a keen eye for detail and a solid understanding of essential techniques. One of the most crucial aspects is lighting. Natural light is often the best choice, as it creates soft shadows and highlights the vibrancy of the food. To harness this, consider using a large window as your main light source, shooting during the golden hour for a warm, inviting glow. Avoid harsh midday sunlight, which can create unflattering and extreme highlights. If shooting indoors, you can diffuse direct sunlight by using sheer curtains or a reflector to bounce light and soften shadows.
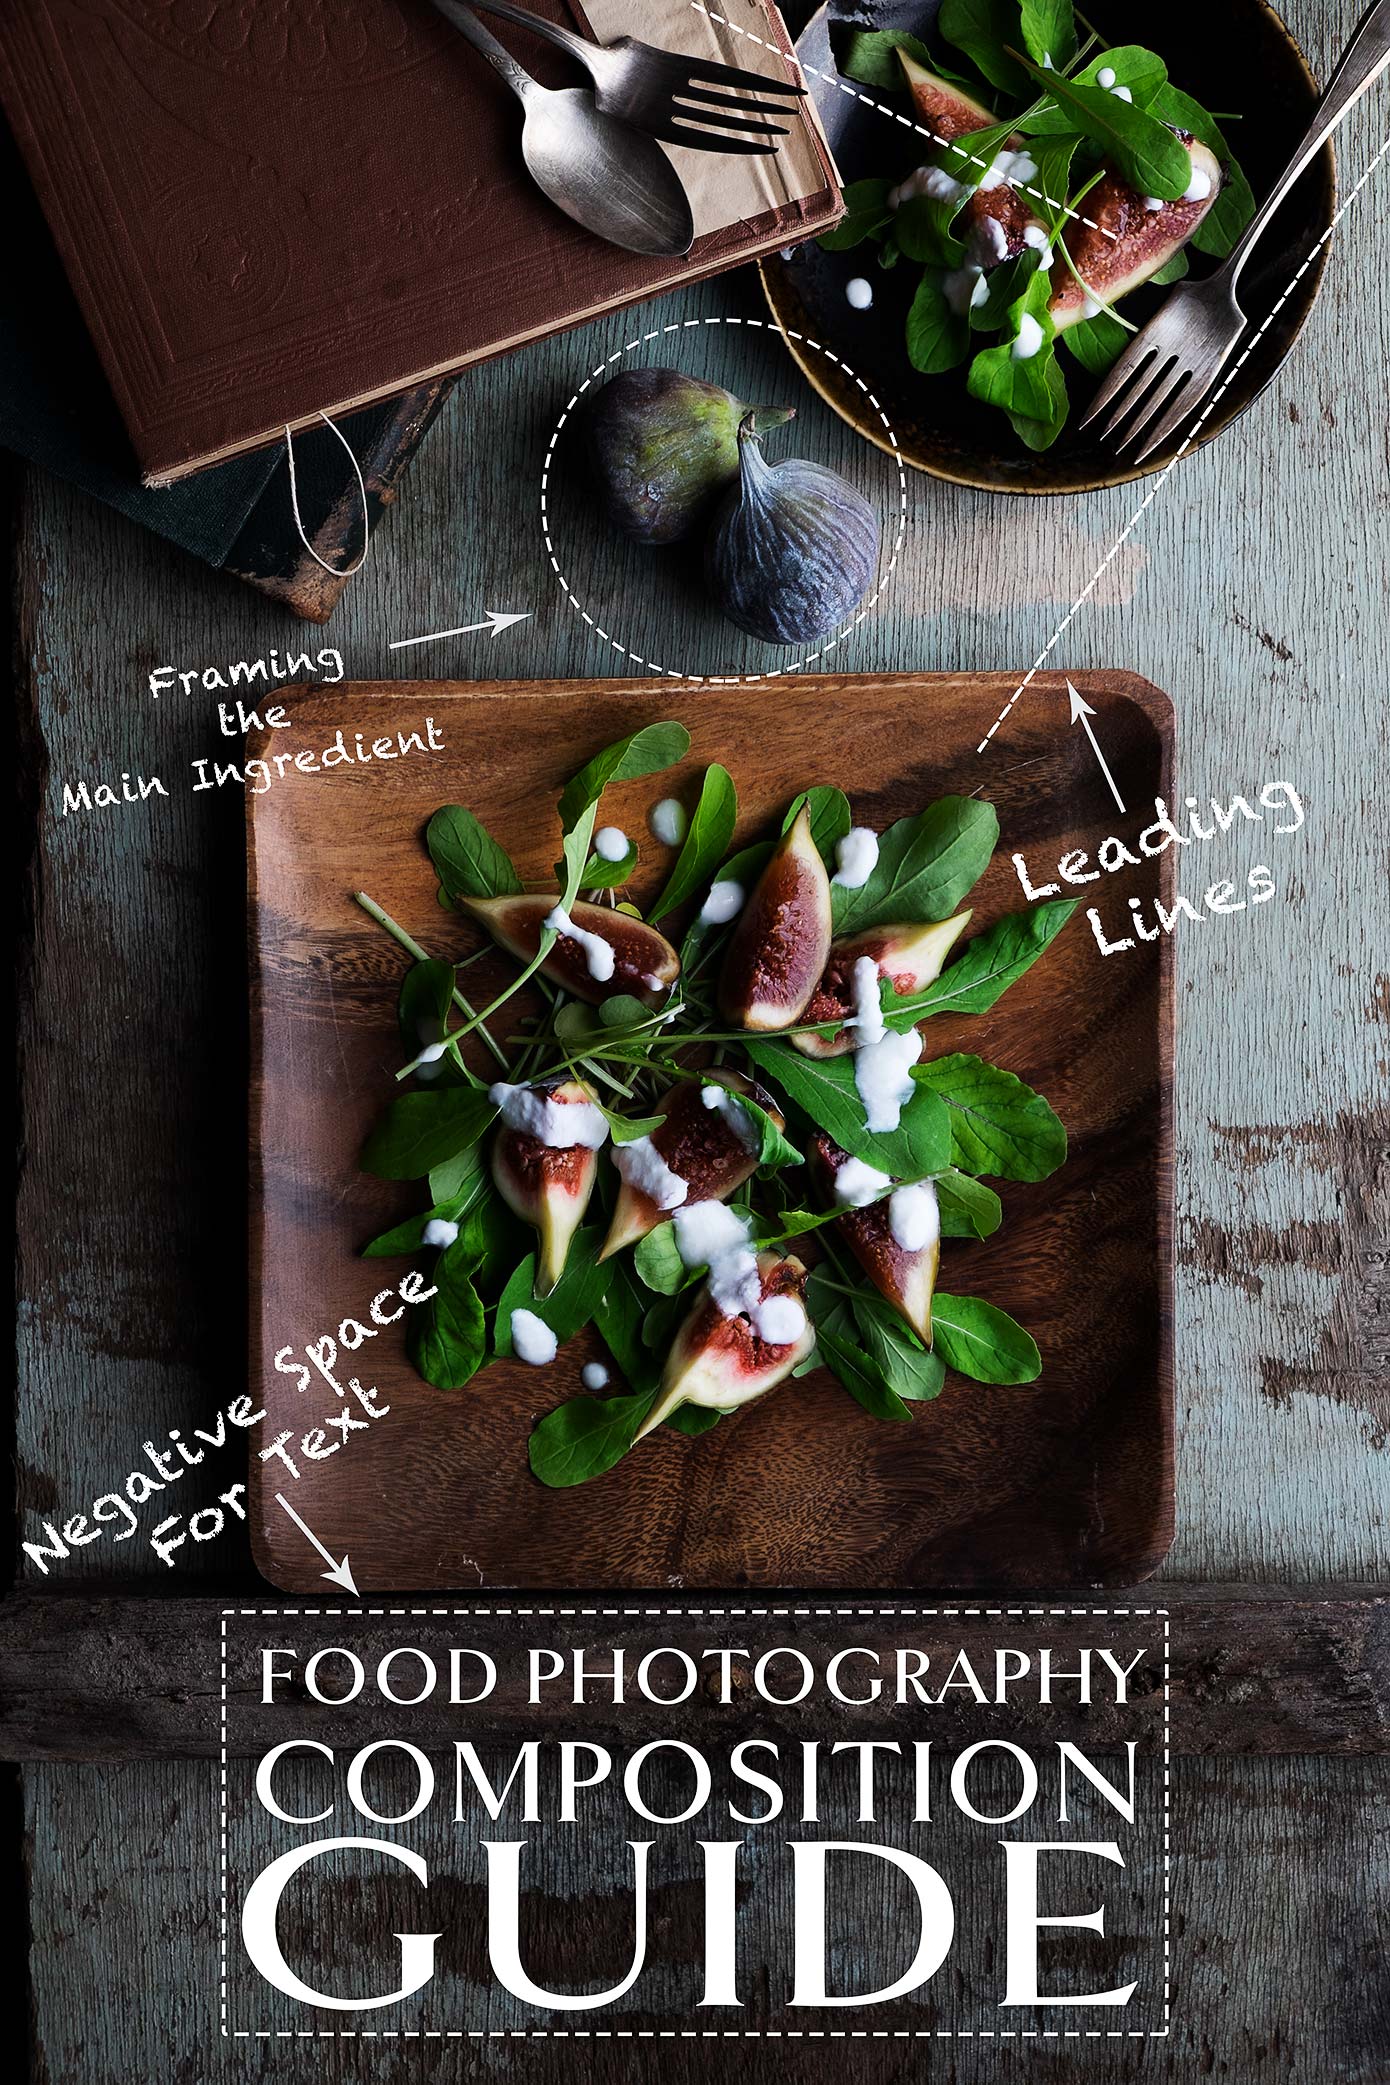
Alongside lighting, the choice of angles can dramatically alter the perception of your dish. There are three primary angles to consider: the overhead shot, the 45-degree angle, and the straight-on shot. The overhead shot works well for flat lays and dishes arranged artistically, while the 45-degree angle captures depth and gives a more dynamic perspective, perfect for burgers or layered desserts. Lastly, the straight-on shot is great for showcasing height and textures in dishes like pasta or tall cakes. Don’t forget to enhance your photos with props such as plates, utensils, and napkins, which can add context and aesthetic appeal, elevating your food photography to the next level.
How to Create Eye-Catching Meal Preps That Are Instagram-Ready
Creating eye-catching meal preps that are Instagram-ready begins with choosing the right containers. Opt for transparent glass or colorful reusable containers that allow the vibrant colors of your ingredients to shine through. Consider using seasonal fruits and vegetables that not only provide nutritional value but also add visual appeal. Arrange your meal components in a visually pleasing way; for example, layer different colors or use compartments to separate various elements. This not only adds to the aesthetics but also makes it easier for your audience to see what they’re enjoying!
Next, don't underestimate the power of garnishes. Fresh herbs like parsley or basil can add a pop of color and texture, while a sprinkle of nuts or seeds can introduce a crunchy element to your meals. When posting on Instagram, consider natural lighting for your food photography, as it highlights the colors better than artificial light. Lastly, use creative hashtags such as #MealPrepGoals or #HealthyEats to reach a wider audience and showcase your stunning meal preps to unravel your culinary creativity!